How to Rescue a Wet Camera

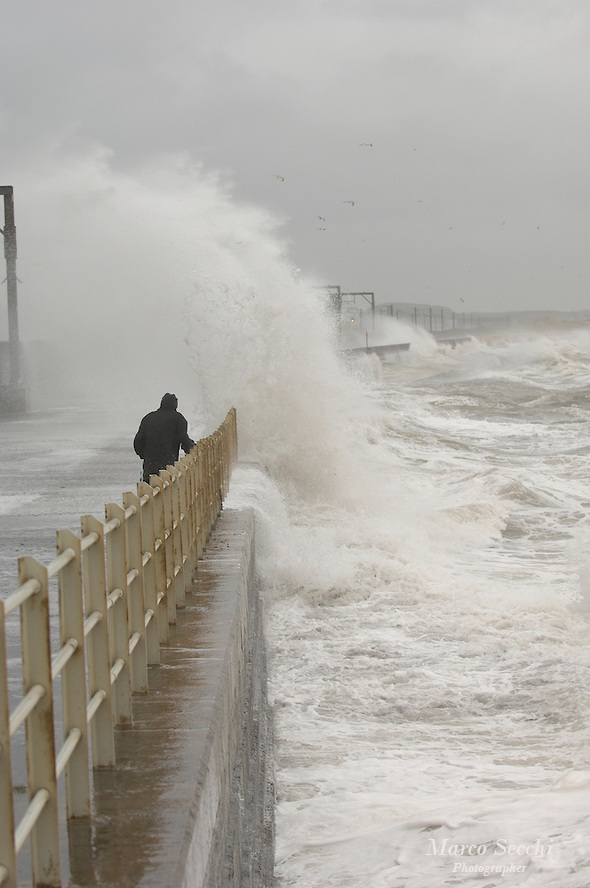
Scotland, Saltcoats 23rd November 2006 Extreme weather condition with strong gales and rain are battering the West Coast of Scotland NUJ recommended terms & conditions apply. Moral rights asserted under Copyright Designs & Patents Act 19

It has happened to me a couple of times covering bad weather in Scotland, to friends and colleagues, even a couple of days ago to one of my Venetian colleague.

Your precious camera meets the water...either in the form of a big splash or heavy torrential rain.

I have managed to recovered my cameras at least 2 times and I have strictly used the following method

  • As soon as it happen switch off the camera, remove the battery, remove memory card, I would say this is the most important action.
  • Do NOT turn the camera on  ever....you may risk to short circuit important parts
  • As soon as you can, make sure there are no traces of moisture visible on the camera.
  • Find a container big enough to hold the camera and a couple of bags or more of rice (Yes RICE)
  • can be a Tupperware container, half fill it with  rice  and then place the dead camera body on top of the rice with the mirror facing down.
  • pour more rice on top of the camera until it is completely covered with about 1 inch of rice above the top of the camera body
  • placed a tightly fitted lid on the container and place it a dry cupboard for at least  one week.

After about a week of drying out in the hermetically sealed rice box you should be able to switch on the camera and scroll through all the menus..,.. if this is the case I would place the camera again in the rice for 4 or 5 days  or leave it near but not too close to a radiator.

Fuji X Custom Settings

Today arrived the new firmware for most of the Fuji X series cameras.  When you update all the custom settings are wiped out as well as cache memory and frame numberHere are more or less my latest  custom settings.

Name ISO Dynamic Range Film Simulation White Balance Colour Sharpness Highlight  Shadow  Noise 
Standard AUTO DR100 Provia (standard) Auto 0 0 0 0 0
Landscape Normal 200 DR100 Astia (soft) Auto -1 +1 -1 -2 0
Landscape  High Contrast 400 DR200 Astia (soft) Auto -1 +1 -1 -2 0
Portrait Neutral 200 DR100 Pro-Neg Standard Auto 0 0 0 0 0
Portrait Neutral Higher Contrast 400 DR200 Pro-Neg High Auto 0 +1 -1 -2 0
B&W Landscape 800 DR100 Mono+Red Auto 0 +1 0 0 0
B&W Portrait 800 DR100 Mono+Green Auto 0 +1 -1 -1 0


I have set them according to the subjects I tend to shot so I can change a whole group of settings with a push of the "Q" menu button and a quick turn of the dial.   Finer tweaks to color and highlight/shadow tone were done from experience of using the camera and the above are what I  eventually arrived at after some months of use.

I tend to play quite a bit with Highlight Tome, Sharpness and Shadow Tone so I change them often. For the ISO thee are times when I like to have in AUTO with Standard 200, Max 3200 and min shutter speed at Focal length I am using x1.8

While I like the more saturated colors and higher contrast in Astia (soft) for landscape generally, I found it tended to clip into the shadows too easily so I somewhat reduced the contrast there by making a -2 adjustment.

For portraits the Provia (standard) or Pro-Neg film simulations work well as they are rather neutral and subdued in colour, so render skin tones well.  The Pro-Neg Hi gives the same colours but more contrast.  I reduced the contrast at the shadow end as I found it was clipping to black too readily.

The dynamic range settings work really well and allow the camera to record more detail in highlights and shadows than in a normal exposure.  For the higher DR setting (DR200 is all I have needed) the camera needs to be set to ISO 400 but the sensor/processor is so effective that there is no discernible noise penalty.  It isn't an HDR feature....my understanding is that it works like many other similar features and the camera basically underexposes the image then processes in an exposure and tone curve that avoids clipping at each end.

The Jpeg output is so good on this camera that I shoot Jpeg almost all the time, whereas I only shoot RAW on my Nikon DSLRs.  Images from the X-E1 print superbly and have amazing pixel level sharpness.  The camera seems to resolve beyond what its 16MP sensor should, probably due to the absence of the anti aliasing filter.  Strangely, when 100% images are viewed on a computer monitor, detail can look somewhat mushy due to the unusual colour filter layout of the X-Trans sensor, but images view nicely at normal sizes and print in a very natural way, giving what I would describe as an organic look to textures that look real enough to touch and bitingly sharp.


Nikon F3

 Nikon F3 – Still a Viable Shooter?Launched in 1980, the Nikon F3 replaced the F2 as their top of the line professional camera body, and went from being the most controversial to one of the best selling film cameras in the history of the company.

Nikon F3

Prior to the introduction of the F3, the Nikon pro bodies had always been fully mechanical, with no reliance on batteries except to power the meter (if you had one of

the metering heads). The F3, however, used a brand new electronically controlled horizontal-traveling titanium shutter which, in contrast to previous models, required battery power to operate.

This initially caused great consternation in the pro community, and the reluctance of many to switch to the new F3 was a real problem for Nikon. Many press photographers were unwilling to give up the reliability of their mechanical F2s for this new, untested electronic camera.

There are plenty of excellent websites that document the various features of the F3 so I won’t duplicate any of that here. What we’re interested in is basically this: is the Nikon F3 still a viable shooter today? The answer is an unreserved ‘Yes!’. A good clean body will set you back around the $200 mark, which is an amazing bargain for a camera this good, and you can use almost the entire range of Nikon manual focus lenses which can be picked up for equally good prices if you shop around a little.

The metering is very accurate, and for most situations I just leave the camera in auto mode and it very rarely gives me a bad exposure, even when shooting transparency film. The viewfinder is fantastic, one of the best I’ve used in a 35mm film camera, offering a full 100% view of the image area. If you are used to the cramped, squinty viewfinders of some consumer or ‘prosumer’ DSLRs, the F3s finder will be a revelation!

While we are on the subject, my 1986 F3 is the ‘HP’ variant, which means it has the high eye-point finder (DE3), with greater eye relief and a little less magnification. This finder is physically a little taller than the original (DE2) prism, but allows you to see the entire viewfinder image with your eye a little further from the eyepiece, which is particularly useful if you wear glasses. Even if you don’t, it’s still an excellent all-round finder and, although some users prefer the original, the F3HP variant would still be my recommendation.

A quick word about the motor drive for the F3. Known as the MD4, it’s capable of a blistering six frames per second, has power rewind and also powers the camera body when attached. What’s more, the camera and motor drive combo handles beautifully; for me it handles better than just the body alone. These can be had a very little money  and make using the F3 a total blast! Oh yeah, they sound cool too!

Go get you one, and shoot some film!


Nikon F2

Launched in 1983, the successor of the FE had a relatively short sales career, but a long legacy.BluePyjamaSyndrome’s Nikon F2

It can be argued that the Nikon FM3a, sold from 2001 to 2006, is much more a descendant of the FE2 than of the FM2.

In 1977, a few years after Olympus initiated the compact SLR revolution, Nikon presented the FM. Like the Olympus OM-1, the FM was a compact semi automatic camera with a mechanical shutter, which could be equipped with a motor drive. But contrarily to the OM-1, which still relied on a CdS light metering system and on mercury batteries, the FM used modern gallium photo diodes and silver oxyde batteries.

It also benefited from a vertical blade metallic shutter, and the exposure metering was relying on 3 LEDs instead of the more conventional match needle arrangement of the OM-1. Solidly built and reliable, the FM was very successful commercially, and the ancestor of a large family of models whose production only stopped in 2006.

The FE from 1978 is the automatic exposure version of the FM. It looks very similar to the FM, but instead of LEDs, it uses two needles to show the shutter speed selected by the photographer (semi-auto mode) and by the automatic exposure system (aperture priority auto mode). In 1982, the FM became the FM2, receiving a new mechanic shutter with titanium blades, which could reach 1/4000 sec and had a flash synchro speed of 1/200 sec.

One year later, the FE2 was launched. Its titanium shutter is an improved and electronic version of the FM2?s, with a X synchro speed now reaching to 1/250 sec. The FE2 also benefits from a modern on the film (OTF) flash metering system (that the FM2 never got). The FM/FE range of products was extended the following year with the presentation of the Nikon FA, which added matrix metering (a world premiere), a programmed exposure mode and trade the brass prism cover of the FM/FE models for a polycarbonate one. Both FE2 and FA were discontinued in 1988. The FM2 lived longer, and was ultimately replaced by the FM3a, which merged the mechanical shutter of the FM2 with the electronics of the FE2.

Using the FE2 as an every day camera

Reasonably light and compact, the Nikon FE2 is very solidly built, and very nicely finished. Compared to a previous generation model like the FM, the FE2 has smoother commands. The viewfinder is typical from a pre-high eye point construction – the enlargement factor is high (0.86) for a good focusing precision, but the frame coverage is limited (93%), and the eye point is very short (14mm), which could be an issue for photographers wearing glasses. Even with thin glasses, it’s impossible to see 100% of the image projected on the focusing screen without having to move one’s eye ball right to left and left to right: you only perceive 90% of the focusing screen when you look straight into the viewfinder, which compounded with the rather limited frame coverage, ensures that you’ll have a wide safety margin on both sides of your prints.  The titanium blade shutter was the most advanced at the time of the camera's launch, with a top speed of 1/4000 sec and a flash sync speed of 1/250 sec.


The determination of the exposure is very conventional for a camera of its generation, with a center weighted measurement provided by two silicon photodiodes. In automatic mode, a needle indicates the speed selected by the exposure system of the camera on a large scale at the left of the viewfinder. The photographer has multiple ways to override the automatism: he can memorize the exposure (pushing the self timer lever towards the lens), apply a correction factor on the film speed selector (from -2 up to +2EV), or switch to semi-auto mode. In this case, a second needle – larger and transparent – appears in the viewfinder, showing the shutter speed selected by the photographer. In a very simple matching needle arrangement, the photographer just has to align the meter needle with shutter speed needle. The shutter speed knob is much smoother than on the FM (in the FE2 the shutter is controlled electronically), and surprisingly the camera is more pleasant to use in semi-auto mode than the FM. No wonder that Nikon derived the exposure control system of the FM3a from the FE2?s and not from FM’s.

Powered by two easy to find LR44 silver oxide batteries, the camera also operates without battery at a speed of 1/250sec. Compatible with any AI, AIs and AF lenses, it’s still perfectly usable today.Less rugged than its FM and FM2 cousins (it has an electronic shutter and a potentially more fragile match needle metering system), it is more pleasant to use and can respond efficiently to a larger variety of photography opportunities. Like the FA and the FM3a, but unlike the FM2, the FE2 benefits from a modern through the lens (on the film or OTF) flash metering system, compatible with the flash units currently sold by Nikon.

Its automatic exposure system is very easy to override, and does not get in the way. The matching needle system in the viewfinder is very informative, easier to read in the sun light than the LEDs of the FG, and than the small LCD display of the FA. With the F3, the FE2 is probably the most usable Nikon camera of the early eighties.

How much for a Nikon FE2? The Nikon FE2 is a very good automatic exposure film camera, and its reputation has obviously an impact on its price. Specialized retailers  sell it between $130 (Bargain) and $270 (Top Condition). As usual, prices are a bit lower on eBay, but the FE2 does not seem to sell for less than $100, with peaks up to $180 for very nice items.I