Unlocking the Potential of Image Licensing: How Google's 'Licensable' Badge Benefits Photographers

Introduction:

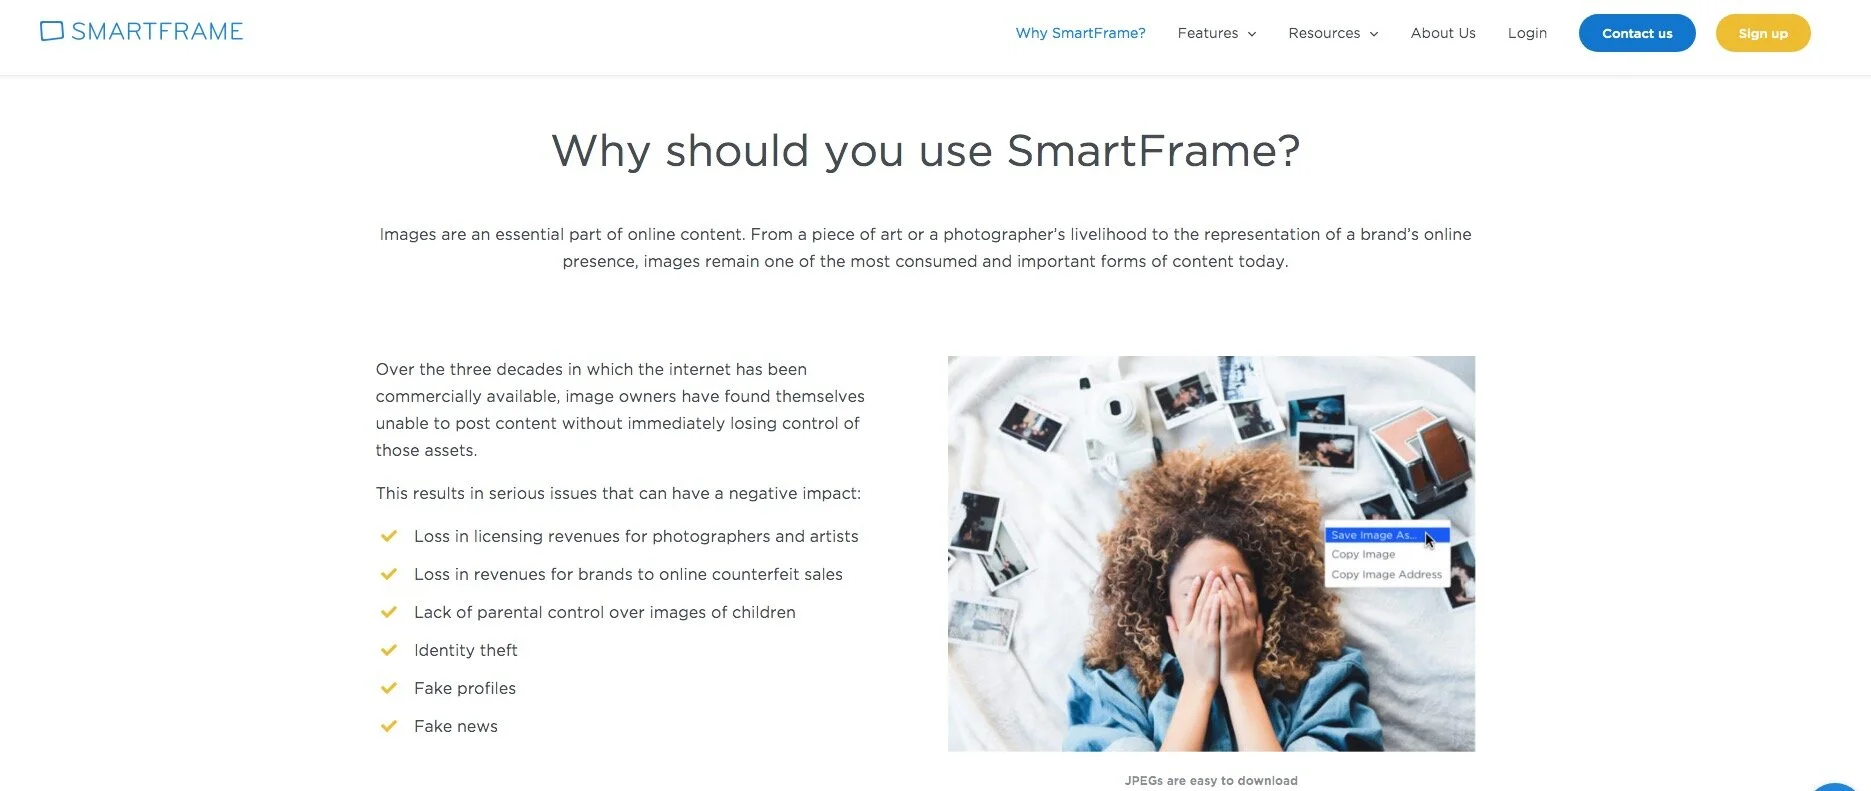
In the digital age, images circulate with ease, crossing borders and screens in a matter of seconds. While this has democratized access to visual content, it also presents a challenge for photographers: protecting their copyrights and generating revenue from their work. Enter Google's 'Licensable' badge, a feature in Google Images that is changing the game for professional photographers and visual artists.

The 'Licensable' Badge: What Is It?

Google has introduced a 'Licensable' badge in its image search results to help users understand which images are protected by copyright and how they can be licensed for use. This small, yet significant, badge provides a visual cue that an image is not simply free to take — it is a product of someone's hard work and creativity that is available for legal use through proper channels.

The Importance for Photographers:

  1. Visibility of Copyright Information: The badge brings a layer of transparency to image copyright. With a quick glance, potential users can see that an image has licensing information available. This is a step forward in copyright education and respects the photographer's property rights.

  2. Direct Path to Licensing: Google allows photographers to link directly to a page where the image can be licensed, streamlining the process. This makes it more likely that interested parties will follow through on proper licensing rather than resorting to unauthorized use.

  3. Improved Monetization: By providing a clear and easy way to license images, photographers can better monetize their work. The licensable badge can lead to increased sales and better control over where and how images are used.

  4. Reducing Infringement: With licensing information just a click away, there’s a reduction in unintentional copyright infringement. Users can no longer claim ignorance as easily when images are marked as licensable.

How It Works:

To take advantage of this feature, photographers need to embed IPTC copyright and licensing metadata directly into their image files. This metadata remains with an image no matter where it is used online, providing a persistent link back to the photographer's licensing information.

Embedding Metadata: The IPTC Standard and the Importance of Web Statement URL

The International Press Telecommunications Council (IPTC) has developed industry standards for metadata that go beyond simple tags and descriptions. This metadata includes vital information like copyright status and licensing terms, and crucially, it also allows for the inclusion of a Web Statement URL.

The Web Statement URL is a direct link to a page where the copyright and usage rights of the image are explained in detail. It's an essential tool for educating users about the legal considerations and restrictions associated with an image.

Web Statement URL and Licensor URL: The Dynamic Duo

Incorporating both a Web Statement URL and a Licensor URL creates a comprehensive framework for image rights and licensing:

  • The Web Statement URL educates users about the rights attached to the image. It often includes a general statement of the copyright terms under which the photographer's content can be used.

  • The Licensor URL goes a step further, providing a direct line of contact or a form through which users can obtain licenses to use the image. This could link to a marketplace, a contact form, or any platform where the license can be purchased or negotiated.

Here are the two pages on my Archive

  • Web Statement URL: https://www.marcosecchi.org/p/rights

  • Licensor URL: https://www.marcosecchi.org/p/licensor-url

By embedding both types of URLs in their image metadata, photographers ensure that anyone who comes across their work on platforms like Google Images can instantly understand not just that the image is licensable but also exactly how to obtain those rights and what the terms of use are.

Conclusion:

The introduction of the 'Licensable' badge by Google is a pivotal move for the photography industry. It represents a step towards better copyright practices online and offers photographers a powerful tool for managing their work. As the digital landscape evolves, embracing these tools will be key to protecting and profiting from your creations.

Copyright Infringement on Social Media - Protect and Act fast!

"Copyright exists once you have an original work of authorship fixed in any tangible medium," says Ruth Carter, an internet lawyer who is an authority on online copyright law involving blog posts, image usage and trademarks as well Social media like Instagram and Facebook.

I had a busy week dealing with an image of High Water in Venice that was circulating on the internet with about 100,000 likes in total.

Ryan Vacca a professor and a member of the school’s Franklin Pierce Center for Intellectual Property said that the goal of copyright law is to protect original creative expression and that images easily fall under this protection.

"For most pieces of creative work, it easily satisfies the minimally creative standard in – assuming they didn't rip it off from somebody else – the original creator is going to have some copyright protection in that image," he said.

If you download an image and post it, whether it be on your site, in a blog post, or on social media, you're likely committing copyright infringement. Copying any images or user-generated content without the creator's permission can constitute infringement, even if you link back to their website or original post.

One of my images was circulating on Social Media with a different author name

One of my images was circulating on Social Media with a different author name


1) I was tipped by one of my followers that one of my images was circulating on Social Media not with my name but a different one

2) I did several searches and posted for info on my channels and found more than 55 infringements.

3) I discovered it originated from a lady that saw the photograph on a UK newspaper, downloaded it, cropped, applied several filters and posted with her name. On her post she was already challenged by one of my followers asking if she was the photographer, she openly said no. She replied to my message straight away, and she apologised, told me she wanted to do something for Venice. I checked her profile, and she has no connection with photography, she had no photographs that could have been stolen. I decided to believe her and let her off the hook.

4) I wrote to all the perpetrators, with a formal Take Down Notice, giving them 4 hours to correct the situation and informing that an invoice was on its way.

5) Few owner or management of sites and channels contacted me promptly. With all of them I agreed to amend the original post, or rewrite it with the correct credits, These channels had in between 5000 to 35000 likes, and I demanded and obtained to do five posts during the year promoting some of my Venice activities. They all agreed. I did not charge any fee,

6) With some of the perpetrators, I decided for a reduced fee in exchange for a quick and prompt payment. I sent a total of 6 invoices, including two Italian celebrities that had used my image. I charged between 350 Euro and 1500 for a total of 3400 Euro. I gave them five days to send the payment before legal action and I have already received two payments.

7) I had no reply from one of them so I decided to file a Copyright complaint form on Instagram. It was easy and fast. After a few hours, I got a reply back, and as requested they removed my image.

If you are writing an email an idea of text can be

what-to-do-when-my-photo-is-stolen-3-900x402.jpg

Your invoice should amount to your usual fees for such usage, plus a margin for ‘damages’. The latter is optional though, and remember that the more you charge, the less likely it is you’ll get the matter settled quickly. You can realistically add a margin of anything up to 50%. If you don’t know what the standard usage fee should be, head over to Alamy.com and search for any Rights Managed image. Click the calculator, and plug in the details of the use in question – you’ll then be given an industry standard price you can quote.

I tend to ask for the lowest fee and offer a 50% discount if paid promptly!

When all started, I knew that the nearly 50 cases I found were only the tip of the iceberg I did not want to waste my time or get too upset, I decided to see it as a commercial opportunity, so decided not to go after the private individuals, small groups etc but only celebs or companies. I opted for a robust approach and very fast action. I worked on hit 16h non stop.

For two days, I concentrated on this problem but overall, a positive experience that generated some extra cash!

NOTE The above image was taken from a website of a UK newspaper, and not from my site,. I am very careful on how I present and show my images


What to do to protect your images 5 STEPS I suggest

1 Add watermarks to your photos

This is the most obvious way to deter casual image theft. Adding a small section of text, or a logo, to the corner of a photo is a great way to stamp ownership onto your photos.

2. Never share a high-resolution file

Hopefully, you are already aware of this, but uploading high-resolution files online to display is a very bad idea. Should someone get hold of the high-resolution file, they can pretty much do what they want with it. It also makes it harder to prove you’re the original photographer, as they have the same file that you’d be using to prove you took the photo.

3. Compress photos you upload

Following on from the previous step, make sure that you compress photos you upload. Aside from the actual dimensions of the image, you can reduce the quality of the photo.

In Photoshop, head to the “File > Export” menu. You can select “Save for Web…” and comfortably export a photo at 60% JPEG quality. This still looks really good, and you can see in the preview that there’s not much difference between that and 90%. It creates smaller, more compressed files that further reduce what someone could do with your image should they get hold of it..

4. Add your copyright to the metadata

You can actually embed your copyright information straight into a JPEG file. You do this by modifying the metadata (some details and/or instructions that can be extracted from a file) using a photo-editing program.

You can do this in Photoshop by navigating to “File > File Info…” and adjusting it there.

5) Use Smartframe Technology

I use Smartframe technology and services to protect and share images. SmartFrame is the ultimate platform for optimizing, securing and presenting your online images, with enhanced tracking and monetization tools. Check here https://smartframe.io/


Screen Shot 2019-11-22 at 19.02.44.jpg